Friday, October 21, 2011

Farewell, Daisy!


During my sewing years I have worked on a variety of different types of sewing machines.
The first one was my mother’s machine that she had received as a present upon her wedding, early sixties model. That machine was the production site for my entire Barbie-fashion-collection. At that time I still wanted to become a fashion designer.  This machine was exchanged for a Pfaff later on, which I was allowed to use every once in a while, but it was always made clear that this was not my machine.
An Aunt then gave me an old cabinet sewing machine that which could be run either by foot pedal, or on electricity. It had been in her way and found a place in our cellar. That was not exactly a highly motivating environment for sewing, but as it was not portable it could not easily be brought upstairs to work with, and then returned back. However, for several years the existence of this machine counted as a sufficient argument against the acquisition of my own machine – “You have one downstairs, and you don’t really use it much!”
A few years later I inherited a portable machine left by my great aunt – again an old one, post-war model, very heavy, but with very nice stitches and a purring sound.  It must have been a top model when it was acquired, even featured approximately 30 embroidery stitches, although I never figured out how to change the pattern notches. This was the machine on which I produced my first patchwork pieces.
When my mother acquired a fancy Bernina I was the recipient of her by then older Pfaff and took it with me. By that time it had begun to develop little peculiarities, however, and although I did use it for several years I was never really happy with it. Unfortunately I had been rather quick in passing on the old post-war model, which I really began to regret when the Pfaff turned out to be beyond repair.
That was the time when I decided it was the right moment to finally acquire my very own and new machine. It must have been approximately ten years ago, because I already knew my husband. Because I did not want to have a sewing computer I decided on a Husqvarna “Daisy”. I used this machine a lot, it went with me to my first Nancy Crow workshops, and I really grew attached to it.


Nevertheless, two other machines somehow appeared in my life during the past six years, and Daisy sort of receded into the background. Lately it had only been going with me when I was teaching workshops where I only needed a machine for demonstrations, because it was the easiest machine to be transported. When I heard that a former student of mine was looking for a machine of her own because so far she had been sharing a machine with her mother I immediately thought that that would be a nice place for Daisy. She would be appreciated again, and today we two parted. I was surprised how hard I took the separation, though – probably because it was my very first very own and self-paid machine? It’s not that I am short of sewing machines – I still have two and will always be able to sew on a substitute even while one is being taken care of at the dealers’...
In any case, I wish Daisy and Rabea a lot of fun together. Farewell, Daisy!

Thursday, October 13, 2011

"Beyond Comfort" - catalogue arrived in Germany!

Yesterday I finally received my complimentary copy of the catalogue for the “Beyond Comfort” exhibit, in which I have two quilts traveling right now. As I had not been able to go and see the exhibit at its opening in venue in Birmingham due to a mistake in planning our family holidays this year, I had been eagerly waiting for the catalogue because I wanted to know what “company” I was being shown in.
At first I was surprised because somehow it had not really registered with me that it is a select show of thirty quilts – even greater the honor to be one of the three artists represented with more than one quilt!
When sitting down to look at the catalogue in detail I was struck by the variety of the pieces included. After all, despite the fact that the challenge had been to move beyond the comfort zone of one’s artmaking until then, the artwork still had to meet the definition of “art quilt” as stated on SAQA’s homepage.
I tried to decide on a favorite – excluding my own ones, because, of course, I’m biased about those. But I couldn’t make up my mind completely.
I love the linework in ‘Mozart’ by Lynne Morin (all pictures taken from the catalogue - forgive the quality, my fault):


I love the approach of ‘When Fog Lifts’ by Tamar Drucker – "use your scrap bag, it’s all you’ve got!" And I was thrilled by Sharon Bell’s two pieces, 'Cascade', and 'Streaming'. Both of these capture the themes so clearly, but the simplicity and purity of design speak so beautifully for themselves that they would be just as powerful if they came without a title.


I sincerely regret that I did not get to see the exhibit in Birmingham, and who knows whether I will be able to see it anywhere at all...
Thanks to Eileen Doughty who curated the exhibit, and to Deidre Adams for the beautiful catalogue design.

The catalogue can be ordered via SAQA's store. I certainly am going to get a few copies to give away to friends.

Monday, October 10, 2011

Mind your seam allowance...


This past weekend I taught a class on scrap quilts. I had prepared a bit of history of the scrap quilt, a bit of color theory, and I had spent considerable time on an exact description of how to calculate seam allowances for certain patterns, especially the “Flying Geese”. The triangles used in Flying Geese need to be cut differently, depending on whether they are to be used as the ‘goose’ or as the background triangle. A goose must have the straight grain on the long side of the triangle, whereas the background parts must have the straight grain on the two shorter sides of the triangle. So while the goose triangle must be cut by cutting a square on the diagonal twice, the background triangles must be cut by cutting a square on the diagonal only once. Naturally, these would be different size squares for one and the same flying goose:


I have never been a wizard at math, but I did learn some important formulas in school, such as the rule of three, which has always helped me find the needed number of stitches in knitting, and I sort of know what to do with Pythagoras’ theorem. However, Pythagoras had not yet encountered sewing machines. And surprisingly many women in quilting have not yet encountered (or ‘only’ completely forgotten?) Pythagoras...

My motivation to start this calculation was the fact that I always sew patchwork items with a ¼ inch foot, whereas I know that most people here still use the standard foot that comes with the machines, which would be in the metric system. First of all, I wanted to be able to tell them the different amounts of seam allowance that had to be calculated into their cutting when you compare inch to metric. But I also wanted the participants to be able to calculate their individual sizes. Personally, I have never been one who would just copy an instruction as given in a book or magazine, but would want to decide on my own size, e.g. 3 7/8 inch as the base length for my flying goose, and not 4 inch...  And of course I have long since been very much aware of the importance of seam allowance, which you simply can’t ignore when you are doing free-hand cutting and parts tend to shrink on you in the finished part when you don’t allow enough fabric to go into the seams.
In any case, it was a first challenge to get the participants to understand the difference between deciding on the size of a completed block and calculating the size of the parts to be cut. This was learned when some of the participants chose a pattern where two equal sized rectangles sewn together on their long side form a square of the same size as the long side:


Here, of course, the cut parts do not exhibit that same characteristic that two of them put next to each other on the long side will form a square, due to the seam allowance.

And it was a second challenge for the participants to understand the differently calculated seam allowances for the goose squares and the background squares. The seam allowance for the long side of a right angle triangle is a different value than the seam allowance for the short sides in a right angle triangle. However, some participants successfully completed a few self-calculated "Flying Geese" blocks:


Two of the thirteen participants did choose a Flying Geese pattern for their project, though, the others stuck with rectangles and triangles cut from the diagonal in a square.

In addition, we found out that seam allowance is not equal to seam allowance. Most of the participants were indeed simply using the standard foot that came with their machine. This being Europe, they all assumed that their feet would have the standardly quoted seam allowance of 0.75cm. Big surprise when almost none of the sewn parts ended up having the same size!
So I made everybody take the ‘seam allowance test’: sew a straight line, and then sew a parallel line next to it as you would when sewing along the edge of your foot – and of the thirteen participants less than half came up with that standard width, the others had 0.8cm, or even 0.9cm. Interestingly enough, the 0.9cm was a model by a brand which had another model with an allowance of 0.8cm. Now wouldn’t you assume that standard sewing feet on the various machines of one brand would have the same seam allowance?
In the end all of the participants sort of understood what they were doing – I hope. But it was certainly a tough lesson. 
And it has taught me, too, that I will stress that factor much more in my teaching in the other classes as well.

Thursday, October 6, 2011

Teaching Beginners


This is the month of teaching. Yesterday evening I started an new evening class for beginners here in our town, and I will be teaching weekend classes in two different locations this coming and the following weekend.
For several years I had been teaching a sort of ongoing evening course, growing more and more advanced, but in the spring I decided they were advanced enough to set off on their own and forced them to ‘graduate’ and start their own informal group. At first I had thought that I would not start with another beginner’s class, because I was afraid that the potential participants had already been here. But when several people approached me that they were interested in learning how to do patchwork, I decided to give it another try. It’s a small group, only five people, four of which I had never met before, and all of them from the ‘younger’ generation. (Not that I asked any of them their age...)
I still remember vividly how it was when I got attracted to patchwork and learned how to use the rotary cutter and the ruler, and found out about how easy it could be to make a nine patch by simply sewing two different strips together. And I love opening up this world of patchwork to complete newcomers, even if I am not usually sewing traditional patterns anymore and have outgrown the floral prints that many beginners typically use.
So yesterday they learned to do a four patch (and a double four patch), and a nine patch. They were shown the principle of a double nine patch, too, but there wasn’t enough time to actually proceed and make one. And all of them need to get a cutting mat and rotary cutter and ruler, first, too, for which I am placing a combined order today.
They were all happy when they went home, and I enjoyed their excitement and joy of fabrics. It will be a nice group to teach, and it gives me a good feeling that I will be involved in getting them started.

Wednesday, October 5, 2011

End of season - Pool Art

It's always a sad day when our local open air pool closes at the end of the summer. Especially this year, when summer hadn't really happened, but seemed to stop by at just about that time. But while we were enjoying the last glorious days of the season I realized that there is quite a bit of art potential hidden in such a pool.


Now I'm waiting for next spring to dive into that art again...

Saturday, October 1, 2011

Daily Oak: September report


Number of days missed: 1
Number of days with more than one visit: 7
Number of visits with more than the two standard perspectives taken: 11
Guest trees: many
Extra pictures for documentation of details: 8
Total number of pictures taken: 98

In my Daily Oak project, I have come three quarters of the way. Only three more months left.

This was the month with the fewest days missed – only one, which makes for an almost perfect attendance! And on that day I took a guest tree picture from a funicular, hence the “many” as indication of guest tree number.

Guest trees, seen from funicular coming down from
the Zugspitze mountain (the highest mountain in Germany).


We had some foggy mornings this month, and the tree seems to be hiding behind the fog then.

Perspective a: foggy morning on September 21, at 7:47 a.m.

Perspective b: foggy morning on
September 10, at  6:36 a.m.

We also had a stretch of rainy days in the middle of the month when I thought it wasn’t ever going to get light again. Once I almost decided not to go to take the picture. But discipline drove me out into the rain, just before it started getting dark, although you can’t really tell the rain on the picture, except for the drop on the lens:

Perspective a: September 18, at 4:56 p.m.
On September 21 - equinox! - I noticed the very first three or four yellow leaves on the tree, indicating the end of summer for real. They are not really noticeable on the pictures, and only a few more have appeared since.

Evening sun on equinox day:
Perspective a, September 21, 6:34 p.m.
I took a few extra pictures a few days later: of the trunk once more, of some of Oak’s babies that can be found beneath and around it, of a few more yellow leaves, and of acorns ripe in the tree (I picked the left one, planning to plant it in our garden).

Acorns in Daily Oak, September 25

A few of Daily Oak's babies -
not exactly a very impressive picture...

First yellow spots on Daily Oak's leaves

Daily Oak's trunk
on September 25
And it is clearly noticeable that the sun’s path is getting shorter, and lower:


Perspective b, September 11, 5:52 p.m.
For comparison: Perspective b,
at almost same time of day on June 17, 5:04 p.m.


Perspective a, September 10, 1:06 p.m.

For comparison: Perspective a at almost
same time of day on June 22, 12:23 a.m.


Tuesday, September 27, 2011

Museum of cloth and weaving: "Tuch + Technik" in Neumünster

When we spent almost three weeks with numerous rainy days on the North Sea coast in August, I took a trip to Neumünster, the former  „Sheffield of  Northern Germany“, and visited the museum “Tuch+ Technik”. The last factory closed in 1991, but the museum offers an interesting and encompassing exhibit on the history of spinning, weaving and clothmaking.

When I got there I realized that the museum was also hosting the „European Art Quilts VI“ at that time. Sheer coincidence, but I will concentrate on the museum as such here.

The musem is easily accessible from the station. And it is a very good example for the fact that visitng a museum can be fun, entertaining and very instructive – ok, you have to be inerested in the subject matter, but that I was. I was greeted by a guide who pointed me to the beginning of the round and promised to fetch me when she was starting the actual demonstration of the machines, which she did, too.
The permanent exhibit gives a complete overview of the develoment of spinning and weaving, and frequently with objects that were actually found in the Neumünster area. And the historical development is always juxtaposed to events in local history, so you get an introduction to that as well.

These are prehistoric weights used in looms, and a reconstruction of an early loom.


You can find several looms from different periods and in various designs and sizes:


I was particularly attracted by the presentation of the development of the process of spinning, from the early hand spindles to spinning wheels, the „Spinning Jenny“ and then the automatic machines. Unfortunately, the „Spinning Jenny“ was not in working condition and waiting for repair, but we saw a demonstration of the big automatic machine:


They also have a 30-m-long „Dreikrempelsatz“, that machine which transforms unspun wool into spinnable pre-threads. A concise film shows you how this machine works:


For some reason, the pre-threads really tempted me to fetch my spinning wheel back from the attic, where it had been banned only a few months ago due to lack of use...:


And then there is qualitäty control: detecting tied knots in a finished wool blanket, opening them up and sinking the threads properly so they will not be noticeable in the finished product:


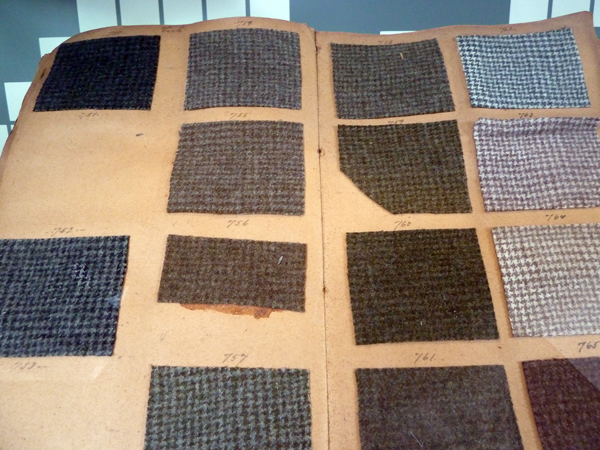
A few more impressions from the museum:


These "Spinndrüsenplatten"
- sorry, don't know the correct English term! -
are used nowadays to spin threads
from recycled plastic bottles!
Too bad that I won’t be able to go to their weaver’s market on October 8 and 9. Too far away...
But if you ever plan to be in the area - go and visit that museum, it is well worth it!